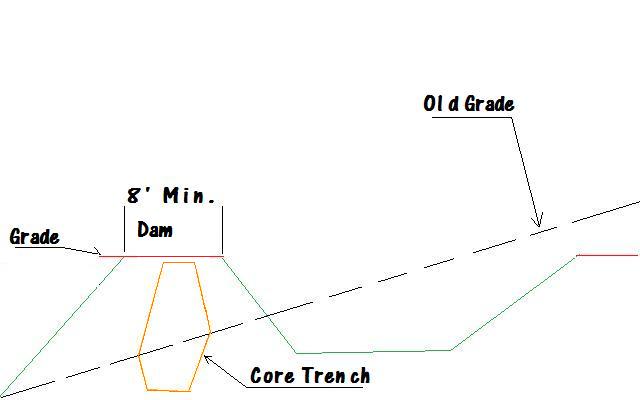
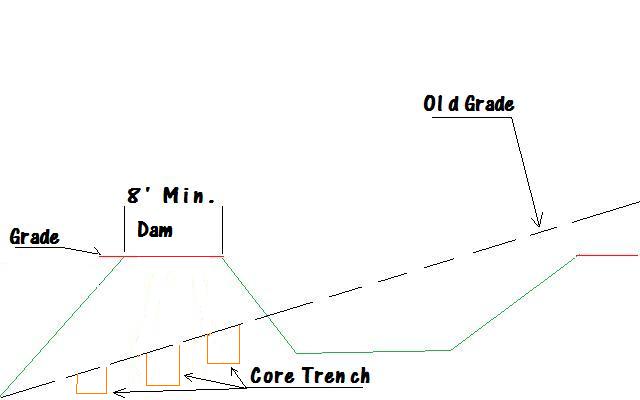
Now that the top soil is out of the way we can get down to business. Starting at the dam area we need to cut in a core trench.
 The core trench can made with the dozer or 2-3 trenches with a backhoe. What is the core trench ? The trench serves two purposes, kind of like a lock for the new fill and a seal to to hold water. Here is an example example, Put some mashed potatoes on a plate and hold it side ways. Chances are it may stick but hold it under water ( in the sink) and the potatoes will slide off. Take the same mashed potatoes, mound them up and pack into an ice cube tray. The ice cube tray acts as the core trench locking in the potatoes or in our case the high clay content fill.
The time to do the core trench is when you start building up the dam. During the removal of top soil, the subsoil will be compacted from the dozer, backhoe, roller or earth mover. This hard packed subsoil ( clay) will need to have a core trench cut in.
Now that The topsoil is out of the way but in an area that it can be used later. Let’s start at the watershed end of the pond. This is the end that will be cut down to grade. Remember that this area needs to be a gradual slope. To help slow the water entering the pond keeping out the silt and erosion.
As the watershed side of the pond is being cut down the excess fill will be pushed to build the dam and sides of the pond.
As the fill is pushed to the dam it should be spread out 4′-6′ inches thick, once a layer is spread out it will need to be tracked in. This means going forwards and backwards over the fresh fill with the dozer moving a track width over each pass. Then turn 90 degrees and track in again. This is packing in the fill making it tight making it binding together. Each time a new layer is spread out it needs tracked in. Packing in the dam is extremely important, if not done properly the pressure from the water will saturate the dam, weakening it and blowing out, bad news.
Let’s say you started late in the season and won’t have time to finish. The most important thing to do is get the watershed end done and keep the rest of the site leveled until you have the time to dig out the pond basin. This way it can be seeded and grass growing to help hold back the silt from entering the pond when it is finished. The next stage is leveling out the whole site using the fill from the watershed area. Doing this will help keep the area dry.
Once you start pushing out for the pond depth it will need finished a.s.a.p. Having a rain storm will make a mess and will need pumped out to continue the digging to depth process. The digging to depth process will produce fill for the dam and for the grade around the pond. This flat surface including the top of the dam should be 8′ minimum in width. It will provide an area to drive around the pond to check on things and help to slow the water down if there is any run off coming from the sides.

